
Key Takeaways
- PS2 BIOS is essential for running PlayStation 2 games smoothly on emulators like PCSX2 (Windows/Linux) and AetherSX2 (Android).
- Always download BIOS from trusted sources like PS2BIOSPro.com to avoid corrupted or unsafe files.
- After downloading, extract the .zip and move .bin files into the correct BIOS folder before configuring your emulator.
- Make sure to select the right region BIOS (USA, PAL, or Japan) that matches your games for maximum compatibility.
- Both PCSX2 and AetherSX2 auto-detect BIOS if placed correctly but you can manually set the folder path if needed.
- Avoid common errors like renaming BIOS files, mixing regions, or skipping configuration these are the top causes of setup failures.
- Once properly installed, your emulator will boot PS2 games faster, smoother, and more accurately, just like the original console.
The quickest and safest way to get working PS2 BIOS files is through PS2BIOSPro.com, which provides verified, region-specific BIOS packages that work on every major platform Windows, Android, and Linux.
This guide explains how to download, extract, and place your PS2 BIOS files correctly on each device so you can later connect them with emulators like PCSX2 or AetherSX2.
Requirements
Make sure you have the following before downloading:
- A stable internet connection
- Enough free storage space (at least 50 MB)
- Extraction software (WinRAR, 7-Zip, or ZArchiver for Android)
- Folder access permissions
- A PS2 emulator installed or ready to install later
How to Download PS2 BIOS Safely?
To download a clean, region specific PS2 BIOS from PS2BIOSPro.com, follow the step-by-step procedure below and place the extracted .bin files into your emulator’s BIOS folder.
Step 1: Visit PS2BIOSPro.com
Open your browser and go to PS2BIOSPro.com. This is the only trusted source that offers authentic BIOS files for all PS2 emulators.
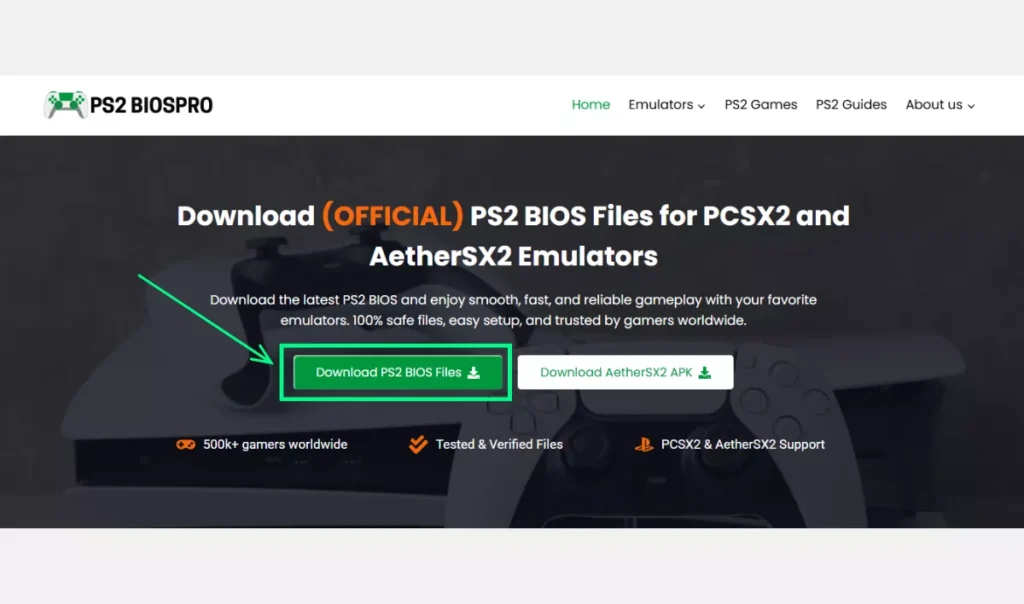
Step 2: Go to the PS2 BIOS Download Section
From the homepage, navigate to the PS2 bios Download. You’ll see multiple BIOS options categorized by region.

Step 3: Choose the Correct Region
Select the BIOS that matches your game’s region for best compatibility:
- USA (NTSC-U) — For North American games
- Europe (PAL) — For European titles
- Japan (NTSC-J) — For Japanese releases
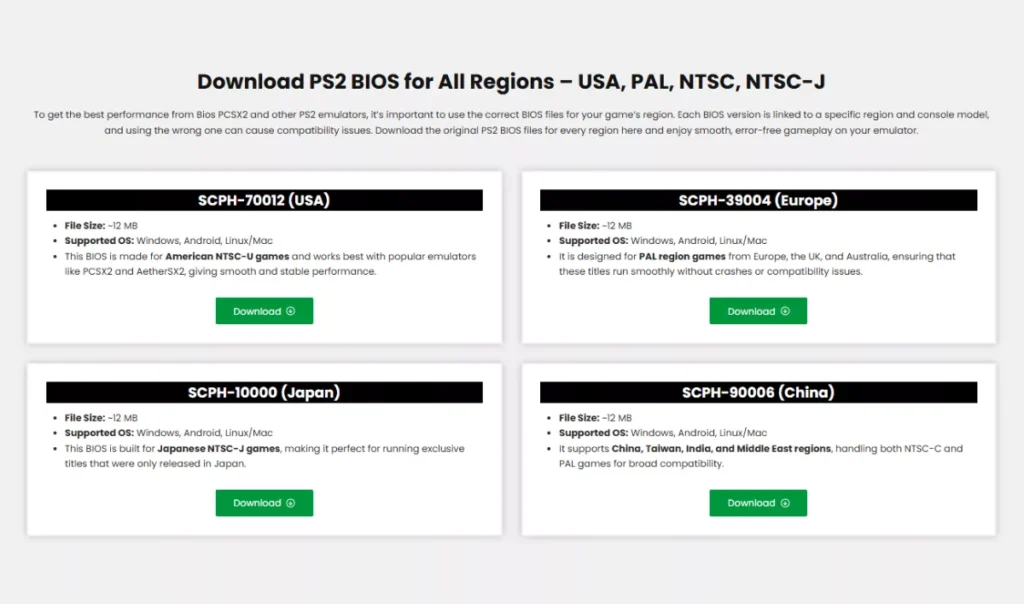
Choosing the correct region ensures smoother performance and avoids black-screen errors.
Step 4: Start the Download
Click the Download Now button under your preferred BIOS version. The file will begin downloading as a .zip archive containing all BIOS variations.
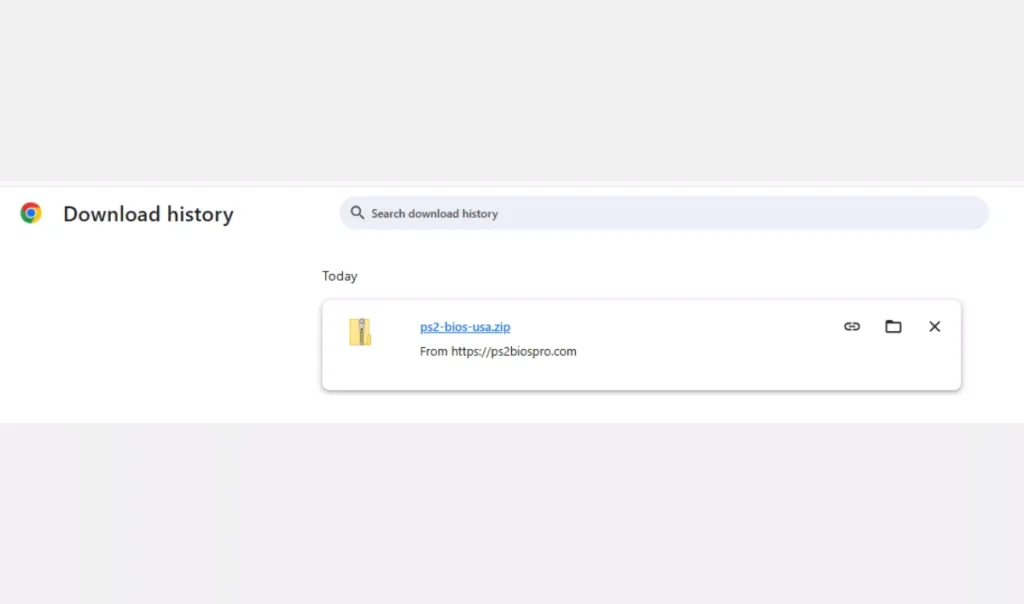
Step 5: Verify the downloaded file
Confirm the download finished (check file name and size) and optionally scan it with antivirus. If the download is incomplete or the ZIP is corrupt, re download the package.
Step 6: Extract the BIOS Files
Once downloaded:
- On Windows/Linux: Right-click the
.zip→ Extract Here (use WinRAR or 7-Zip).
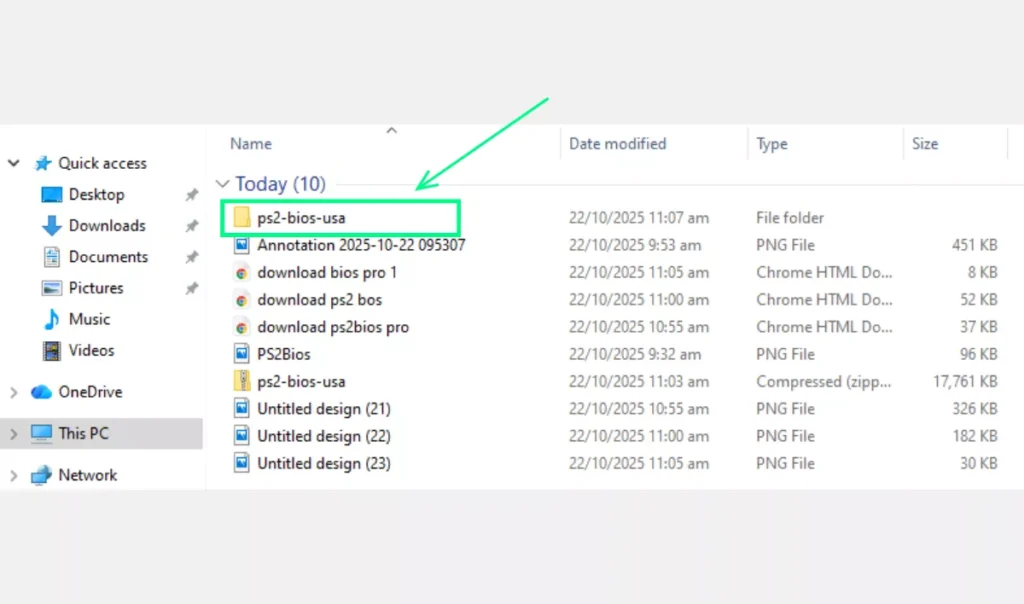
- On Android: Open the file with ZArchiver → Extract to a folder of your choice.
You’ll get several .bin files, such as:
SCPH-39004.bin
SCPH-70012.bin
SCPH-50004.bin
Step 7: Place the BIOS Files in the Correct Folder
Move the extracted files into a dedicated BIOS folder.
Examples:
- Windows / PC:
C:\PCSX2\BIOS - Android:
/storage/emulated/0/AetherSX2/bios/ - Linux:
~/.config/PCSX2/bios/
✅ Pro Tip: Don’t rename BIOS files emulators automatically detect their correct names. Keep them all in one safe folder for future updates or backups.
How to Use the PS2 BIOS on Different Platforms?
Once your BIOS files are downloaded and organized, you can connect them to your favorite emulator. Below are folder-placement and verification tips for each platform.
Windows / PC
Setting up your PS2 BIOS on Windows is straightforward and takes just a few minutes. Once placed in the right folder, PCSX2 automatically detects the BIOS files without extra setup.
- Create a folder named BIOS in your PCSX2 directory.
- Move all extracted
.binfiles into it. - Open PCSX2 once installed; it will automatically detect BIOS files in that folder.
- If not, browse manually to
C:\PCSX2\BIOS.
Android (Using AetherSX2)
Android users can easily configure PS2 BIOS using the AetherSX2 emulator, which supports direct BIOS selection from your storage.
- Move the extracted BIOS
.binfile to/storage/emulated/0/AetherSX2/bios/. - Open AetherSX2 → Settings → System → BIOS Path.
- Select the BIOS file and save changes.
- Restart the app — it will auto-detect the BIOS.
Linux Users
Linux users can also enjoy seamless BIOS setup by placing files in the correct configuration directory. The process is nearly identical to Windows, with only a different file path.
- Create a BIOS directory in
~/.config/PCSX2/bios/. - Copy all extracted
.binfiles there. - Launch PCSX2; it should recognize the BIOS automatically.
- If not, go to Config → BIOS Selector and set the correct path.
Tip: Some Linux distributions require enabling folder permissions to allow BIOS detection.
Common Mistakes to Avoid
Even though downloading and setting up Playstation2 BIOS Files is simple, a few small mistakes can cause your emulator to crash or fail to detect the BIOS. Here are the most common issues users face and how to prevent them.
Downloading from unverified sources
Avoid downloading BIOS from random websites or forums. Many of them include corrupted or unsafe files. Always use PS2BIOSPro.com for clean and verified BIOS downloads
Forgetting to extract the ZIP file
If your BIOS files are still inside a .zip archive, PCSX2 or AetherSX2 won’t detect them. Make sure to extract all .bin files before placing them in your BIOS folder.
Renaming BIOS files
Emulators expect specific file names (like SCPH-39004.bin). If you rename them, the BIOS won’t load correctly. Keep the original names after extraction.
Placing BIOS in the wrong folder
BIOS files must be in the correct directory.
- On Windows:
C:\PCSX2\BIOS - On Android:
/storage/emulated/0/AetherSX2/bios/ - On Linux:
~/.config/PCSX2/bios/
If the emulator doesn’t find them, double check your folder path.
Mixing BIOS from different regions
Don’t combine USA, Europe, and Japan BIOS files in one folder. Choose one region that matches your games for better compatibility and smoother performance.
Skipping BIOS configuration in settings
Even if BIOS files are in the right place, some users forget to select them in Config → BIOS Selector (PCSX2) or Settings → BIOS Path (AetherSX2). Make sure to configure it once, then save settings.
Quick Fix: If your emulator still can’t detect the BIOS, check your folder path, file names, and region 90% of BIOS setup issues come from these small mistakes.
Safety and Maintenance Tips
- Always download BIOS only from PS2BIOSPro.com to avoid corrupted or infected files.
- Keep a backup of your BIOS folder before reinstalling emulators.
- Avoid editing or renaming BIOS files.
- Periodically scan your files with antivirus software.
Conclusion
Downloading PS2 BIOS on Windows, Android, and Linux is simple if you follow the correct steps. By using PS2BIOSPro.com, you ensure clean, verified BIOS files that work flawlessly on any emulator.
Once you’ve extracted and placed your BIOS in the right folder, your emulator will recognize it automatically paving the way for a smooth setup on PCSX2 or AetherSX2.
FAQs
Can I use the same BIOS file on Windows and Android?
Yes, BIOS files are universal. You can use the same .bin file on any device or emulator.
My emulator says “BIOS not found.” What should I do?
Make sure the BIOS files are extracted and placed directly in the emulator’s BIOS folder, not zipped.
Do I need multiple BIOS files for different games?
Not necessarily. One region-appropriate BIOS (like NTSC-U for USA) can run most games smoothly.